When it comes to cooking the perfect steak, many home cooks focus primarily on the cooking process itself.
However, two critical steps often get overlooked: resting and slicing the steak. These steps are crucial for achieving a tender, juicy, and flavorful steak that is pleasing to both the palate and the eye.
In this comprehensive guide, we will delve into the concepts of resting and slicing steaks, explaining why they are essential and providing you with detailed instructions and tips to master these techniques.
By understanding and implementing these practices, you can elevate your steak-cooking game and impress your family and friends with restaurant-quality results.
I. The Importance of Resting Steaks
Resting steaks may seem like a trivial step, but it plays a significant role in the final outcome of your meat. The process involves allowing the steak to sit after cooking but before slicing or serving. Here’s why resting is crucial:
A. Enhancing Flavor and Juiciness
Resting steaks allows the meat to reabsorb its juices, resulting in a more flavorful and succulent steak.

During the cooking process, the heat causes the moisture within the meat to move towards the center.
Resting allows the redistributed juices to redistribute evenly throughout the steak, preventing them from spilling out onto the cutting board when sliced. As a result, each bite retains its juiciness, leading to a more enjoyable dining experience.
B. The Science Behind Resting and Muscle Fibers
To understand why resting is essential, it’s helpful to grasp the science behind it. When meat is exposed to heat, the muscle fibers contract, causing the juices to be pushed towards the center of the steak.
Resting allows these fibers to relax, helping the juices redistribute and settle evenly throughout the meat.
Slicing the steak immediately after cooking would cause the flavorful juices to escape, leaving the steak drier and less appetizing.
C. Recommended Resting Times
The ideal resting time for steaks depends on several factors, including the thickness of the cut and the cooking method used.
As a general guideline, thicker steaks should rest for a longer duration. Here are some recommended resting times:
- Thin cuts (less than 1 inch): Rest for about 5-10 minutes.
- Medium cuts (1-1.5 inches): Rest for approximately 10-15 minutes.
- Thick cuts (1.5 inches or more): Rest for at least 15-20 minutes.
These times are flexible and can be adjusted based on personal preference and the desired level of doneness. Keep in mind that larger cuts, such as a roast, may require more extended resting periods.
II. The Resting Process
Now that we understand the importance of resting, let’s delve into the step-by-step process of resting steaks properly:

A. Step-by-Step Guide
Remove the steak from the heat source:
Once the steak is cooked to your desired level of doneness, carefully remove it from the heat source, whether it’s a grill, stovetop, or oven.
Tent the steak with foil or a plate:
Place the cooked steak on a cutting board or a serving plate. To prevent excessive heat loss, lightly cover the steak with foil or an overturned plate. This “tenting” technique helps retain some heat while allowing excess moisture to escape.
Allow the steak to rest at room temperature:
Position the steak in a warm area away from any drafts. Let it rest undisturbed for the recommended time, allowing the juices to redistribute and the fibers to relax.
B. Tips for Maintaining the Steak’s Temperature
While resting, it’s crucial to maintain the steak’s temperature within a safe range to prevent it from cooling down excessively. Here are some tips to help you achieve this:
Avoid sealing the steak tightly:
When tenting the steak with foil or a plate, make sure to leave a small gap or create a loose covering. This allows some heat to escape, preventing the steak from becoming overly hot and continuing to cook.
Consider the ambient temperature:
If you’re cooking in a warm kitchen, you can reduce the resting time slightly, as the steak will retain heat more effectively. Conversely, if the kitchen is cool or drafty, you might want to extend the resting period to compensate for heat loss.
Use a meat thermometer:
If you’re concerned about the steak’s temperature, you can use a meat thermometer to monitor it during the resting process.
Insert the thermometer into the thickest part of the steak without touching the bone for an accurate reading. Aim for a temperature of around 130-135°F (55-57°C) for medium-rare.
C. Common Misconceptions About Resting Steaks Debunked
There are a few misconceptions surrounding resting steaks that we should address:
Myth: Resting makes the steak cold:
Resting does cause a slight drop in temperature, but it won’t turn the steak cold. The goal is to allow the steak to retain its warmth while redistributing the juices for optimal flavor and tenderness.
Myth: Resting makes the steak lose its crust:
Resting will not cause the steak to lose its flavorful crust. The crust develops due to the Maillard reaction during the cooking process, and it remains intact during resting. In fact, resting can help the crust set and remain crisp.
II. Slicing Steaks: Techniques and Tips
Resting your steak has allowed the juices to redistribute and the meat to relax, ensuring optimal flavor and tenderness.

Now it’s time to slice your steak for serving. Proper slicing techniques and tips can make a significant difference in the presentation and overall dining experience. Let’s explore the best practices for slicing steaks:
A. The Importance of Proper Steak Slicing
Slicing a steak correctly not only enhances the aesthetics of the dish but also affects the texture and mouthfeel of each bite.
Proper slicing helps maintain the steak’s juiciness and tenderness by preserving the integrity of the muscle fibers and minimizing moisture loss.
B. Recommended Tools for Slicing Steaks
To slice steaks with precision, it’s important to have the right tools. Here are some recommended tools for slicing steaks:
- Sharp chef’s knife: A sharp, high-quality chef’s knife is essential for clean and smooth cuts. Look for a knife with a long, thin blade for better control and maneuverability.
- Carving fork: A carving fork, or a long meat fork, is useful for holding the steak steady while you slice through it. It provides stability and reduces the risk of accidents.
C. Slicing Techniques for Different Steak Cuts
Each steak cut has its own unique characteristics, and the slicing technique should be adjusted accordingly. Here are the recommended slicing techniques for some popular steak cuts:
Ribeye:
Ribeye steaks are known for their marbling and tenderness. To slice a ribeye steak, follow these steps:
- Place the ribeye on a cutting board, making sure it’s secure.
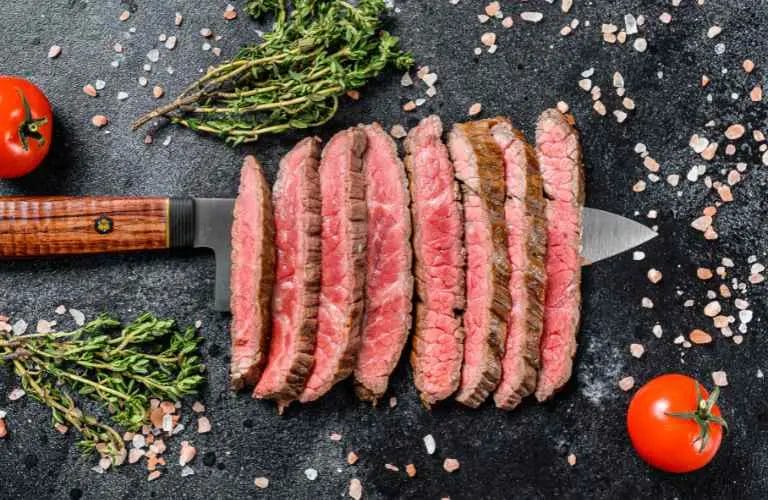
- Using a sharp chef’s knife, start at one end of the steak and make thin, even slices across the grain. The grain refers to the lines or fibers running through the meat.
- Work your way across the steak, maintaining a consistent thickness for each slice.
Filet mignon:
Filet mignon is a lean and tender cut of steak. To slice a filet mignon steak, follow these steps:
- Place the filet mignon on a cutting board, ensuring it’s stable.
- Hold the steak with a carving fork to maintain control and stability.
- Using a sharp chef’s knife, slice the filet mignon into medallions or steaks, cutting against the grain for optimal tenderness.
Strip steak:
Strip steaks, also known as New York strip or sirloin steaks, are flavorful and moderately tender. To slice a strip steak, follow these steps:
- Position the strip steak on a cutting board and secure it.
- With a carving fork, hold the steak firmly in place.
- Using a sharp chef’s knife, cut thin slices against the grain, starting from one end and working your way across.
T-bone steak:
T-bone steaks consist of two main sections: the strip steak and the tenderloin. To slice a T-bone steak, follow these steps:
- Place the T-bone steak on a cutting board, ensuring stability.
- Use a carving fork to hold the steak steady.
- Cut along the bone, separating the strip steak and the tenderloin.
- Follow the slicing techniques mentioned above for each section, cutting against the grain.
D. Tips for Achieving Consistent and Even Slices
To ensure that your steak slices are consistent and visually appealing, consider the following tips:
Let the knife do the work:
Use a gentle sawing motion rather than applying excessive pressure. Allow the sharpness of the knife to glide through the meat effortlessly.
Maintain a consistent thickness:
Aim for slices that are of similar thickness throughout the steak. This consistency ensures that each piece cooks and tastes evenly.
Use a smooth cutting motion:
Avoid a back-and-forth sawing motion, as it can tear the meat and affect its tenderness. Instead, use a smooth, continuous cutting motion for clean slices.
Take your time:
Rushing through the slicing process can lead to uneven cuts and potential accidents. Take your time to ensure precision and safety.
III. Serving and Presentation
Serving and presenting your sliced steaks with care and attention can elevate the dining experience and impress your guests.

Here are some suggestions and tips for serving and presenting your perfectly sliced steaks:
A. Plating Suggestions for Sliced Steaks
Individual plating:
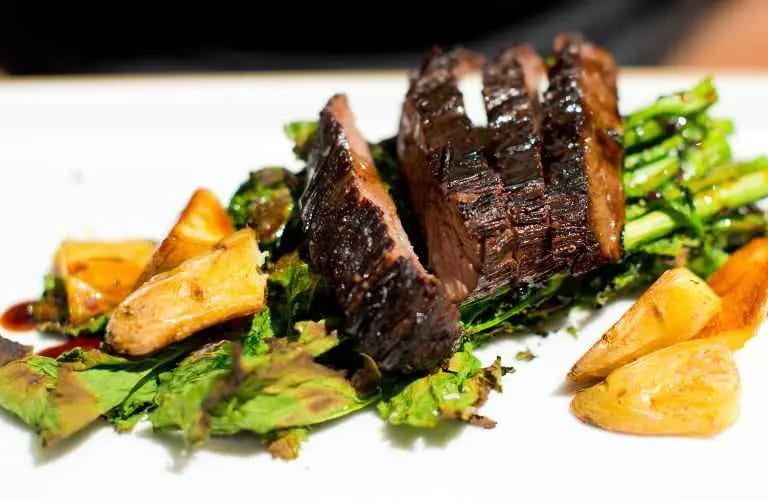
For an elegant presentation, consider plating individual servings of sliced steak. Arrange the slices neatly on each plate, slightly overlapping them for a visually appealing display.
Family-style platter:
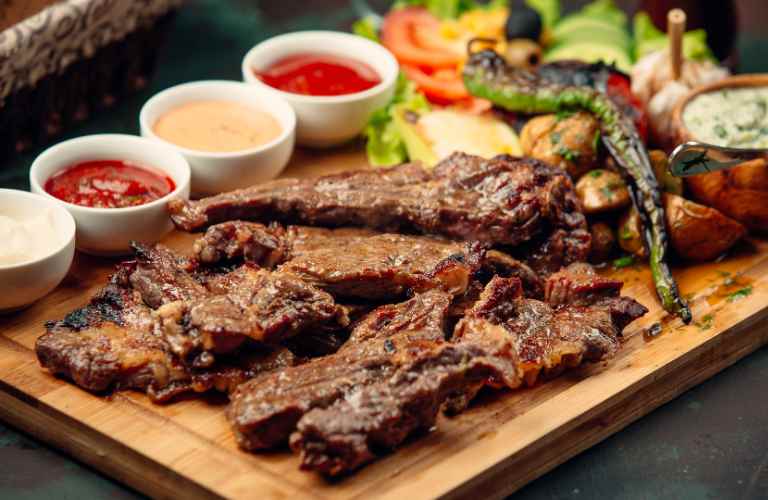
If you prefer a more communal dining experience, present the sliced steak on a large platter in the center of the table. This allows guests to help themselves to their desired portions.
Garnish with herbs:
Sprinkle some freshly chopped herbs, such as parsley, thyme, or rosemary, over the sliced steaks to add a touch of freshness and enhance the visual appeal.
B. Accompaniments and Sauces
Pairing your sliced steaks with delicious accompaniments and sauces can enhance their flavors and create a well-rounded meal. Here are some ideas:

Classic sides:
Serve your sliced steaks with traditional side dishes like roasted potatoes, sautéed vegetables, or a crisp green salad.
These sides complement the richness of the steak and provide a balanced meal.
Sauces and condiments:
Offer a selection of sauces or condiments for guests to enhance the flavors of their steak slices. Popular options include chimichurri, creamy horseradish sauce, garlic butter, or a red wine reduction.
Bread or rolls:
Serve some warm bread or rolls alongside the sliced steaks to mop up any remaining juices or sauces. This adds a delightful texture and completes the meal.
C. Tips for Presenting Sliced Steaks Attractively
To make your sliced steaks visually appealing and appetizing, consider the following tips:
Arrange the slices neatly:
Take care to arrange the slices in an organized manner on the plate or platter. Pay attention to the alignment and symmetry to create an aesthetically pleasing presentation.
Use a clean cutting board:
If you’re serving the sliced steaks directly from the cutting board, ensure it is clean and free from any remnants or stains. A clean presentation adds to the overall appeal.
Add colorful elements:
Incorporate colorful elements on the plate or platter to make the presentation more vibrant. Consider adding roasted cherry tomatoes, grilled vegetables, or a sprinkle of colorful spices like paprika.
Consider height and layers: If plating individual servings, experiment with adding height and layers. Stack the slices or overlap them to create visual interest and dimension.
Conclusion
Resting and slicing steaks are essential steps in achieving a perfectly cooked and enjoyable dining experience.
By allowing your steak to rest, you ensure that it retains its juiciness and tenderness. Proper slicing techniques and presentation further enhance the visual appeal and overall satisfaction of the meal.
Now armed with the knowledge and techniques provided in this beginner’s guide, you are ready to impress your family and friends with beautifully sliced, flavorful steaks. Remember to prioritize patience, precision, and attention to detail to achieve the best results.
Happy cooking and bon appétit!
Frequently Asked Questions
It’s time to address some common questions that may arise regarding resting and slicing steaks:
Can I skip the resting process?
Resting the steak is crucial for optimal flavor and tenderness. Skipping the resting process may result in a less juicy and less flavorful steak.
How does resting affect cooking times?
Resting is not included in the overall cooking time. After removing the steak from the heat source, allow it to rest separately for the recommended time before slicing and serving.
Can I slice the steak immediately after cooking?
It’s best to resist the temptation to slice the steak immediately after cooking. Slicing too soon can cause the flavorful juices to escape, resulting in a drier steak.
How thick should the slices be?
The thickness of the slices depends on personal preference. However, a general guideline is to aim for slices that are about ¼ to ½ inch thick for an optimal balance of texture and tenderness.
Is resting necessary for all types of steaks?
Yes, resting is recommended for all types of steaks, regardless of the cut or cooking method. Resting allows the juices to redistribute and the meat to relax, resulting in a more flavorful and tender steak.
Can I rest a steak for too long?
While it’s important to let the steak rest, excessively long resting times can cause the steak to cool down too much. As a general guideline, avoid resting a steak for more than 30 minutes to prevent it from becoming lukewarm.
Can I refrigerate a steak immediately after cooking instead of resting it?
It’s not recommended to refrigerate the steak immediately after cooking without resting.
Refrigerating the steak right away can cause the muscle fibers to contract and retain less moisture, resulting in a less tender and juicy steak.
Does the resting time depend on the doneness of the steak?
The resting time is generally consistent regardless of the desired level of doneness. Resting allows the steak to equalize in temperature and for the juices to redistribute, benefiting steaks cooked to various levels of doneness.
What should I do if the steak becomes cold during the resting process?
If you find that the steak has cooled down significantly during resting, you can briefly warm it in a low oven (around 200°F or 95°C) for a few minutes before serving. Be cautious not to overheat it, as it may result in overcooking.
Should I slice the steak before or after resting?
It is recommended to rest the steak first and then slice it. Slicing the steak immediately after cooking can cause the flavorful juices to escape, resulting in a less juicy final product.
Can I reheat the sliced steak after it has rested?
It is possible to reheat the sliced steak after it has rested, but be cautious not to overcook it. You can gently warm the slices in a preheated oven or a skillet over low heat until they reach your desired serving temperature.

